Posted on

How many bees does it take to produce a teaspoon of honey?

It’s that time of the year as the weather warms and the bees start buzzing happily in the countryside.  Today, as we had our daily dose of delicious health-enhancing raw honey, at DrBeekeeper we asked the question – how many bees does it take to produce a teaspoon of honey? Any guesses?

Incredibly, on average a worker bee will produce 1/12th of a teaspoon of honey in their lifetime.  So it takes 12 worker bees to produce a single teaspoon of honey!  Taking that further, to produce 0.5lb (227g) of DrBeekeeper honey it takes about 30,000 bees travelling 27,500 miles and visiting more than a million flowers to gather the nectar required.DrBeekeeper English Wildflower Honey with Gift Jute Bag

We can’t wait to see the bees this weekend as the weather warms above 12C so it’s warm enough to open the hive and check they’re all OK.  Bees truly are the most incredible, special little miracle workers who sweeten our day!

Posted on Leave a comment

Bee inspection: The incredible variety of pollens; transferring bees from commercial to national box

Frame with pollen of various colours
The amazing variety of different coloured pollens collected by my bees reminds me of the leather souq in Fez – the oldest tannery in the world

The great thing about night shifts is you have plenty of time during the day to inspect bees.  On my last inspection I checked the Nucleus hive and the Old hive…

Inspection: Nucleus Hive

Last time, I was relieved to find a few eggs so I was very happy that the colony was ‘queen right’ (had a queen).
This time, I saw 2 whole frames with eggs laid individually in each cell.  They look like tiny grains of rice and take some practice to spot.  The key thing is getting the angle of the frame right so that you get the light shining directly into the eggs.  Anyway, in terms of stores there was hardly any honey.  I thought about putting a frame feeder in but at this time if year with so many flowers I think it’s better for bees to feed naturally.  So I got 1 frame full of honey from Old hive with its bees and placed it in the nucleus hive.  I thought the bees might fight each other but they just eyed each other and carried on.  If I were to combine two complete colonies that would be different – could result in warfare? We’ll look at how that’s done some time.

Inspection: Old Hive

Last time, you may recall I was in the process of transferring bees from a commercial brood box I bought into my national brood box.  The hive had been arranged from bottom to top with a commercial brood box, queen excluder, a national brood box, queen excluder, and super at the top.  This arrangement was necessary as I thought the queen was still in the commercial but couldn’t guarantee it.  So I wanted to make sure wherever she was, whether in the commercial or national brood box, she was isolated.
This time, I opened the hive and found the national brood box (which was sitting on top of the commercial brood box) had sealed brood and no eggs (suggesting that the queen had previously been there but was no longer present).  I therefore knew she must be in the commercial brood box (underneath the national brood box).  The issue was that I needed to get her into the right box i.e. my national brood box.  So I used a simple method to ensure the queen was transferred into my national box.  First, I put the national brood box at the bottom of the hive. Second, I individually shook all the bees from the commercial frames into the national brood box (hoping the queen was also shaken in).  So the hive orientation from bottom to top was national brood box, queen excluder, commercial brood box, queen excluder, super.  The reason for keeping the commercial box as part of the hive is to allow brood there to develop and hatch; also as a back up just in case the queen was accidentally left in the commercial brood box. Next time, we’ll see if the queen definitely made it to the national brood box. The process described is much easier if you can find the queen and manually transfer her but it’s not always possible to find her so the shaking method is quick and easy.
The leather souq in Fez (Morocco) is reminiscent of variety of pollen collected by bees on frames
During my inspection I saw the amazing variety of different coloured pollens the bees were bringing in.  No wonder honey tastes so good and has so many health benefits.  In Dr Beekeeper’s Superfoods series coming soon we’ll explore the health benefits of hive products like pollen in more detail.
Posted on 2 Comments

How I lost my bees and ended up with two new colonies…

The tragic loss of my first colony of bees.

Earlier this year, as soon as it was warm enough to open the hive, I was shocked to find on my first inspection of the season all the bees were DEAD.  They stood there as if frozen by time.  The emergency feed, fondant placed on top of the brood box, clearly didn’t work.  It was sad losing my first colony which I have been sharing with my followers since I first started this blog.

Why do colonies fail?

A good examination of the failed colony is important to try to identify this.  There are several reasons why a colony may fail including:

  • Lack of food stores may be indicated by bees being found trying to feed.
  • Weak colony with too few bees to support the colony.
  • Bee disease eg if the front of the hive and frames have bee faeces that could indicate the bees were suffering from dysentry.  Dysentry can occur as a result of fermentation of stores over the winter.
  • Mice may have become resident in the hive if there was no mouseguard in place.  You can see signs of this with gnawed hive parts and the smell of mouse urine.

Action plan for managing a dead colony

  1. Close off the hive entrance until you have time to inspect it properly.
  2. Inspect the frames carefully, ideally with an experienced beekeeper, to try to identify why the colony didn’t survive.
  3. Ideally discard any used frames.   It is safer to start with fresh frames as you can be sure these are disease free.  It is possible to salvage and re-use old frames which saves money but takes considerable time:
    • Cut out the beam which holds down the foundation by removing the nails.
      When I attempted salvaging some of the old frames I found evidence of disease.  These frames were discarded.
    • Discard the drawn out foundation using a knife to cut this away from the sides and bottom of the frame.
    • Remove any excess wax with a hive tool.
    • Scorch the wood with a blow torch being careful not to burn the wood (it will go slightly darker brown in colour).
    • Then reassemble the frame with some new foundation.
  4. Sterilise all the hive parts using a blow torch.  This can be purchased from any good DIY store.  It is essential to sterilise all the equipment to help prevent spread of any potential infection to your new colony.
  5. Call your local beekeeping division to find out if any bees are available in the area or buy bees online.

Getting started with a new colony…
I called my local bee division and explained what had happened.  They were extremely helpful as they put me in contact with a beekeeper who had a colony to sell which I bought for just £60.  I brought the brood box full of bees home to make a new hive.

A delivery of new bees!

The only problem was that the brood box I bought was a commercial box and I needed to convert it to my national brood box (as all my hives are nationals).

Transferring bees from a commercial brood box into a new national brood box

  1. Start with the commerical brood box at the bottom of the hive, and place on top of this your new empty national brood box (containing frames with foundation).

    The hive should now look like this with the commercial brood box at the bottom and the new national brood box sitting on top.
  2. Leave the bees for a week to allow them to start occupying the new national brood box.
  3. Make a new hive entrance using an adapted eke by cutting a small notch in the middle of one side.

    First trace a small hive entrance on the eke with pencil…

    …then use a saw to cut out the new entrance on the adapted eke.
  4. Inspect the colony, find the queen and place her in the new national brood box (which is sitting above the old commercial brood box).
  5. Between the two brood boxes place a queen excluder and the adapted eke above this.
  6. The final hive from bottom to top will be: old commerical brood box (no longer has queen in it); queen excluder, specially adapted eke with entrance, new national brood box (containing the queen); crown board; roof.
  7. Reinspect a week later and check that the queen is laying eggs in the new national brood box.
  8. Then remove the adapted eke from the hive and place the new national brood box at the base of the hive so that it uses the normal hive entrance.  On top of this, place the queen excluder and then the old commericial brood box. At this point the hive from bottom to top will be: new national brood box; queen excluder; commercial brood box; crownboard; roof.
  9. You have now successfully transferred the brood bees from a commercial box to a national box.  The commercial box will now act as a super and any honey can be harvested.  Alternatively the commercial box can be sold to a beekeeper using commercial boxes.

I started the process of transferring bees from the commercial brood box to a new national brood box.  When I got to step 4 however, I couldn’t locate the queen.  In fact there was no brood or eggs to be found!  I did however, see 2 queen cells which appeared to have hatched.

Two queen cells appeard to have hatched providing hope that there was at least one virgin queen in the hive.

So I closed the hive and reinspected after 10 days in the hope that a virgin queen had mated and would be laying eggs.

When I reinspected 10 days later, again there was no sign of eggs.  I then called my division about the situation and fortunately there was a swarm that had been collected into a nucleus hive.   I brought this home and left it for a few days.  When I inspected the nucleus hive I was relieved to find lots of eggs!

Eggs found in the nucleus hive.
Eggs found in the national frames of the new hive.

I then went back to my original hive and was surprised to find lots of eggs (so the virgin queen must have mated).  And that’s the story of how I lost my first colony and ended up with 2 new colonies!

Posted on 16 Comments

The wonders of a wet towel in warding off robbing bees

Towel placed on hive front
An effective strategy against robbing bees

In early autumn, as I observed the hive entrance, I noticed something was wrong as there appeared to be large bees at the hive entrance literally attacking my bees trying to gain access to the hive.  I quickly established that these were robbing bees who were stealing honey from my hive.

Home made hive entrance reducer

To deal with this problem, I started by reducing the hive entrance size using my home made entrance reducer produced simply from a piece of cardboard and some tape.  This definitely helped, but it didn’t completely stop the robbing bees.

So I did some research into robbing bees and came across the most bizarre idea – using a wet towel!

Here’s how it worked… I simply soaked a small towel in water and rested one end on the hive roof so that it draped down the entrance leaving a small space between the towel and the hive front.

Amazingly, almost immediately, the robbing bees became confused and were unable to find the hive entrance.  Also, after a day or so I could see that my own bees had worked out how to enter and leave the hive.  Reassuringly there was also no sign of robbing bees at this time whilst the towel remained on.

At this time, with the abundance of fruit around the garden, I noticed there were wasps hovering around the hive.  However, to my surprise, not a single wasp attempted to gain access to the hive via the new open sides (between the towel and hive front).  I think this simple idea might be an effective strategy not only for robbing bees but also another tool in the battle against wasps.

Posted on 2 Comments

Extracting honey doesn’t have to be taxing!

There’s lots of ways of harvesting and using the products from the hive so here we’ll explore what preparation you need to make for harvesting, how to harvest the honey itself and the process of jarring, labelling and distributing the honey so you can make the most of it…

1. Getting ready for honey extraction


What you need:

  • Jars – you can estimate 30lb of honey for each full super to work out how many you need.
  • Porter bee escapes – 2 for each hive
  • Honey bucket – to collect the honey
  • Knife – to uncap the capped honey cells
  • Honey extractor (although you can harvest without an extractor)
  • Bee brush – helpful but not essential (the horse hair one is gentler on the bees than the plastic version)
The day before you decide to extract, place the crown board underneath the super/supers to be extracted with the porter bee escapes fitted to the two holes in the crown board.  This acts like a valve clearing the bees from the super/s you want to extract honey from and transferring them to the lower part of your hive.  It may be necessary to place an empty super under the crown board to make space for the bees leaving the super/s being cleared in preparation for extraction.

2. Harvesting honey


Harvesting without a honey extractor

Honey extractors are very expensive and it may not always be possible to get access to one from your local association.  Fortunately, even without a honey extractor, harvesting couldn’t be easier.

Option 1: you simply take off a frame of sealed honey and serve directly from the frame! This is great if you’re sharing with others.

Option 2: You can also take a frame and cut the comb into squares which can be put into plastic containers.

The advantage of both of these methods is that you retain the wax which has it’s own taste and health benefits.

Option 3: Use a muslin sheet and placed the honey comb in the sheet.  Then squeeze the honey out into jars.  This allows you to separate the honey from the wax.

Harvesting with a honey extractor

  1. Start by removing the supers which area ready i.e. are full of honey cells which are capped.
  2. Over a bucket and using a bread knife slice off the top layer wax capping (this is called uncapping) so that you reveal hundreds of open honey cells.
  3. Place the uncapped supers into the extractor ensuring that they are placed opposite each other to balance the weight.
  4. Start the extractor machine, which spins the supers like a centrifuge releasing the honey from the uncapped cells into the storage bucket.
  5. Once a good volume of honey has been extracted, open the tap at the front of the hive and release the honey into a honey sieve (2 sieves placed on top of each other with the coarse sieve above the finer one) placed above a honey bucket.
    Its worth putting a cling film cover over the sieve at this stage to stop stray bees or wasps feeding on your honey
  6. Allow the honey to settle for a couple of days.
  7. The honey is now ready to be placed in jars.

3. Jarring honey


Buy honey jars through your local association to benefit from bulk buying and save on postage costs.  It’s best to rinse the jars in warm water or place in a dishwasher to make sure they are completely clean.  The washed jars are then placed in a tray and heated at 100C for 5-10 minutes to ensure that every last drop of water has evaporated.  While they are being heated clean the inside of the lids with a damp cloth.  Remove the heated jars from the oven and allow to cool before pouring the honey into each jar using a measuring jug.  Ensure you close the lids tightly.

4. Labelling honey jars

You can buy professionally made labels, but these are very expensive so if you can it’s worth making your own.  The best thing it to buy some labels of the required size which you can put through your printer (ideally laser printer so the ink is waterproof).  There are certain legal requirements for honey labels if you plan to sell – you need to include these details:

  1. Include the word ‘honey’ which can be prefixed with the type of honey or it’s origin.  eg. Essex Honey.
  2. Weight in metric with figures at least 4mm high for 454g and 227g weights.  Imperial weights can also be shown in close proximity to the metric but must be less prominent.
  3. Your name and address.
  4. The country of origin eg. Produce of UK.  This must be in addition to your address.
  5. Best before date (usually 2-5 years).  If the full date (day, month, year) given a lot number is not needed.  Otherwise this must be added.

5. Distributing and Selling your honey

Essex Honey Show 2013
  • Give to family and friends.
  • Sell it in local shops (eg farm shops or country parks) and at honey shows.
  • Enjoy the taste yourself!


So that’s the process from honey extraction to distribution.  It’s great fun doing this and when you’re finished you can sit down and relax as you enjoy the taste of your honey!
Posted on 28 Comments

The Battle of Wasps attacking Bees. Here’s how my bees are winning…

DrBeekeeper’s two pronged strategy for protecting a bee colony from wasp attack

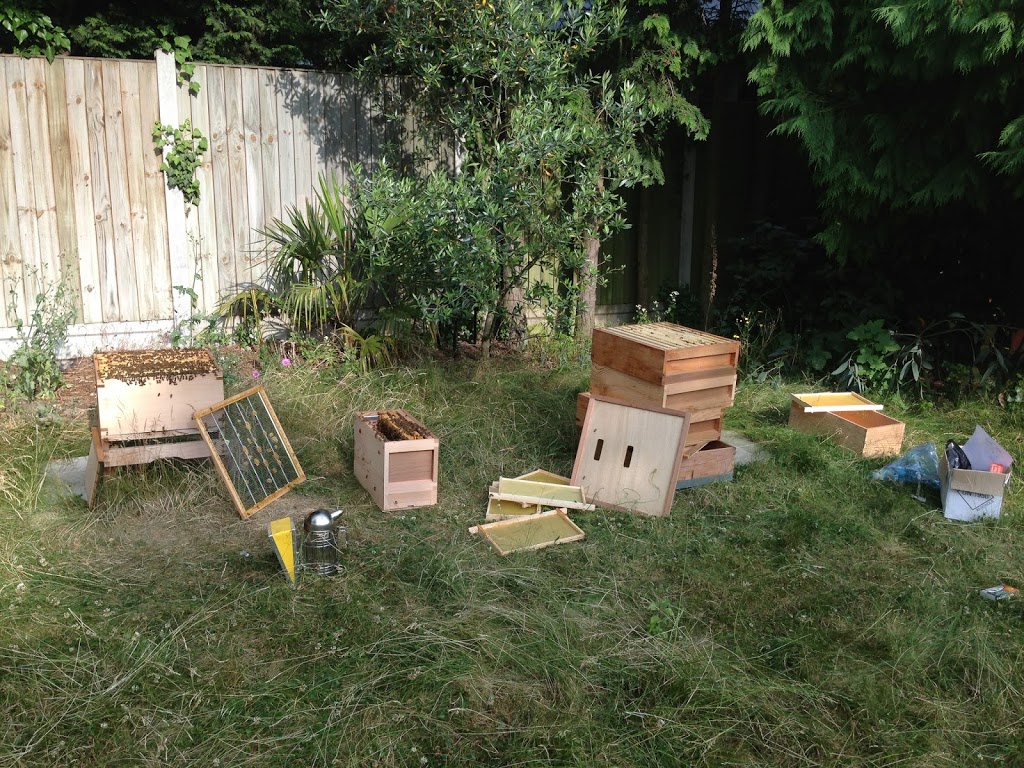
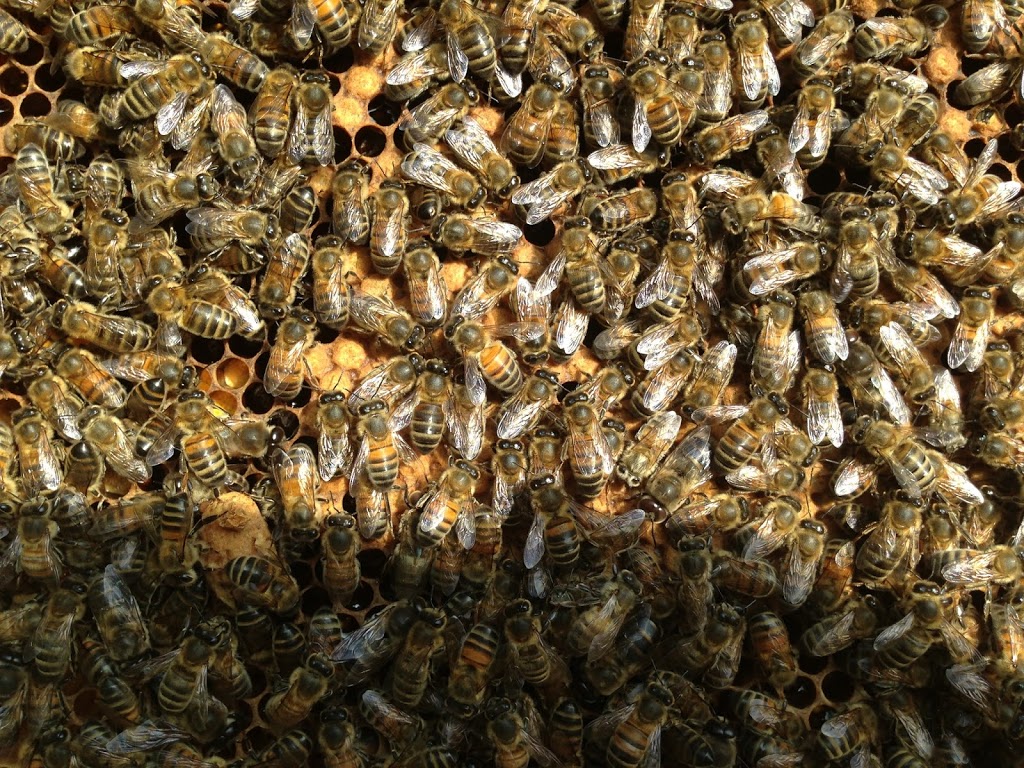
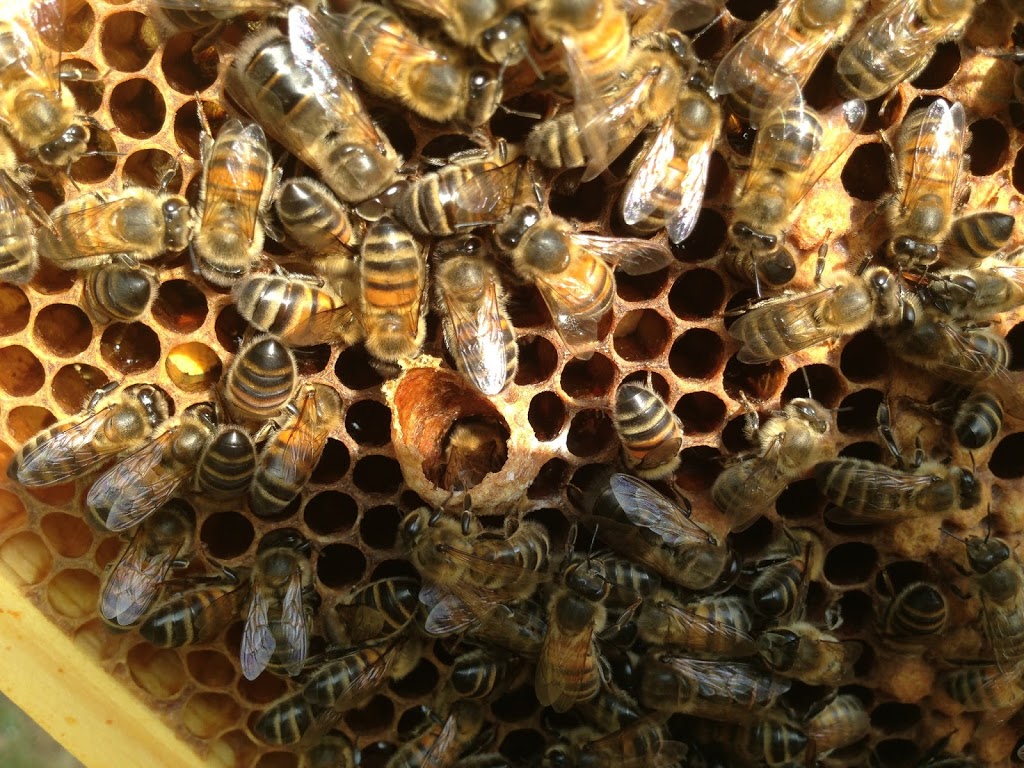
A few weeks ago I noticed a few wasps roaming around my new hive and thought nothing of it until I soon found the wasps were actually entering my hive through the entrance.  The colony was small so the guard bees at the entrance were not strong enough to resist the wasps attacking bees.  I ignored this for a while, hoping it would sort itself out, only to find a few days later a major battle occurring between the bees and wasps at the hive entrance.

Observing the hive entrance at this time was like looking at a warfield.  The wasps were ferocious, literally flying at bees near the hive entrance, lifting them into the air and depositing them in the ground in front of hive.  At times, they would simply walk into the hive with no resistance from the bees whatsoever.  During this time, I had read about how wasps can actually dismember bees and destroy colonies.  I had worked hard to make this new colony – I couldn’t bear to allow the wasps to kill my bees!

So I developed a two pronged strategy using trial and error to tackle these two key problems:

  1. The hive entrance is too wide for bees to defend
  2. There are too many wasps roaming around the hive

PROBLEM 1: The hive entrance is too wide for bees to defend

SOLUTION 1:

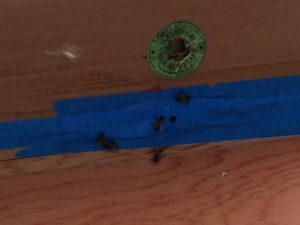
Restrict the entrance size with any sort of barrier.  For cost saving, I simply used some strong duck tape and applied this on both sides of the entrance leaving a 1cm width gap in the centre to allow bees in an out (Experiment 1).

Experiment 1

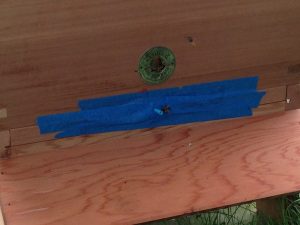
However, although less wasps were entering, there were still significant numbers gaining entry to the hive.  So I then tried completely occluding the hive entrance with duck tape leaving a 6mm diameter hole (Experiment 2).  Although this allowed bees in and out, I noticed that the single bee entry actually made it hard for the guard bees to defend the hive when a wasp chose to enter.

Experiment 2

During this time I read that wasps don’t like to enter tubes so I filled the 6mm hole with a short cutting of a straw (Experiment 3).  This was hugely successful at ensuring no wasps entered the hive, but also had the undesired effect of stopping bees entering and leaving too!

Experiment 3

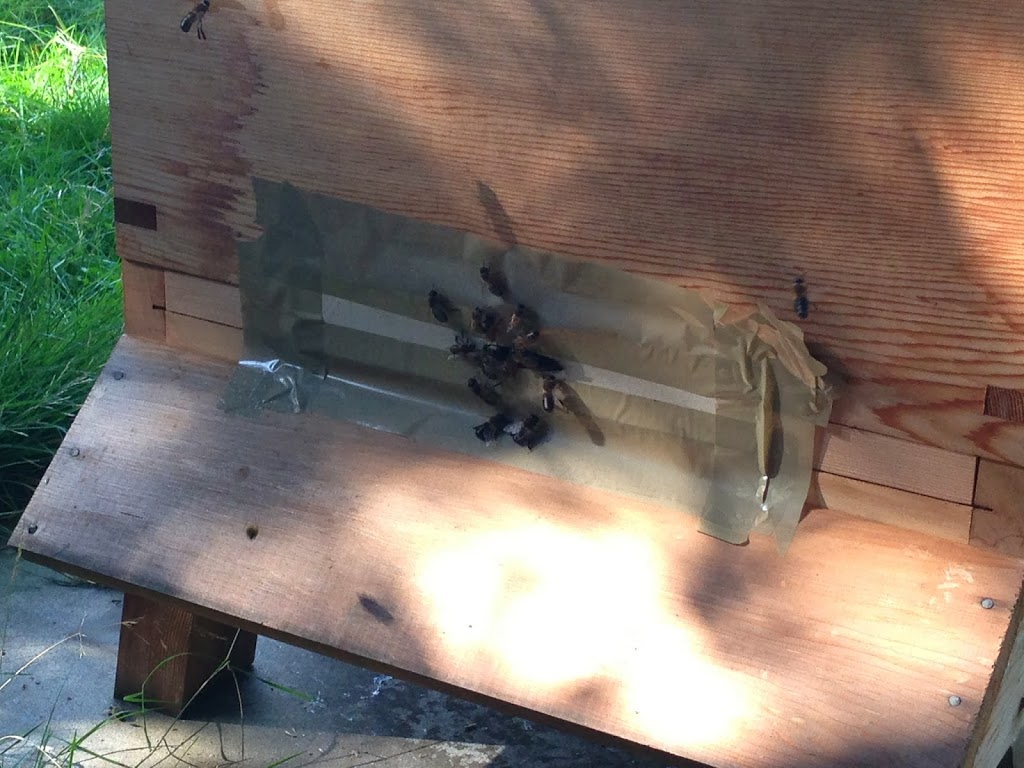
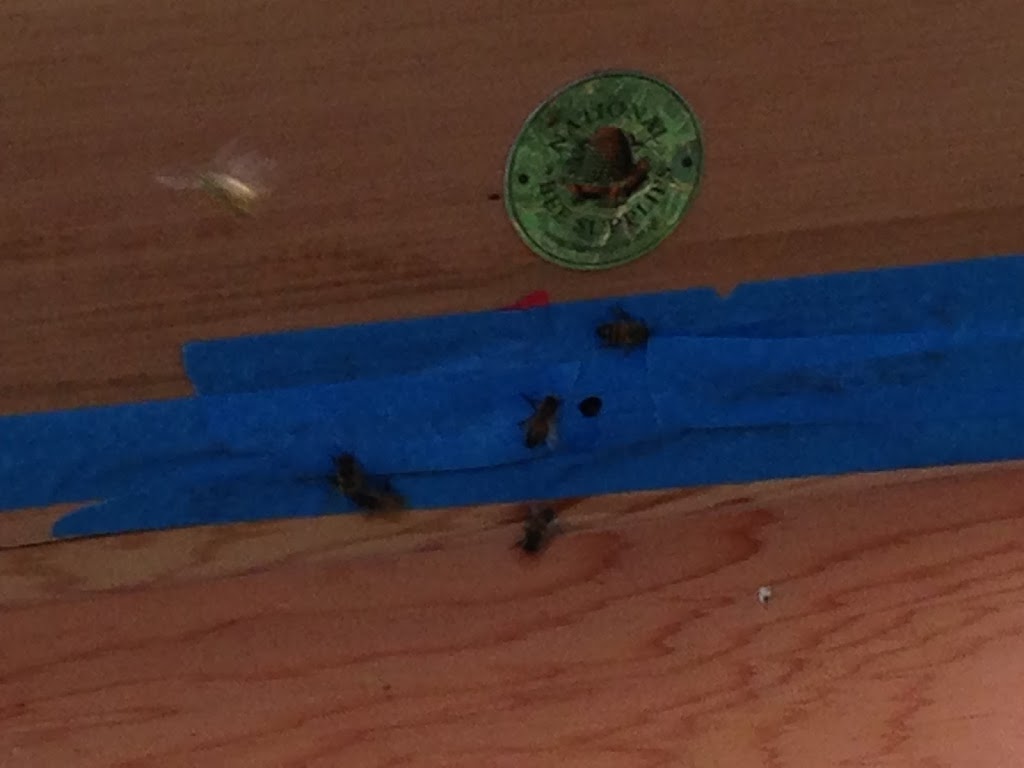
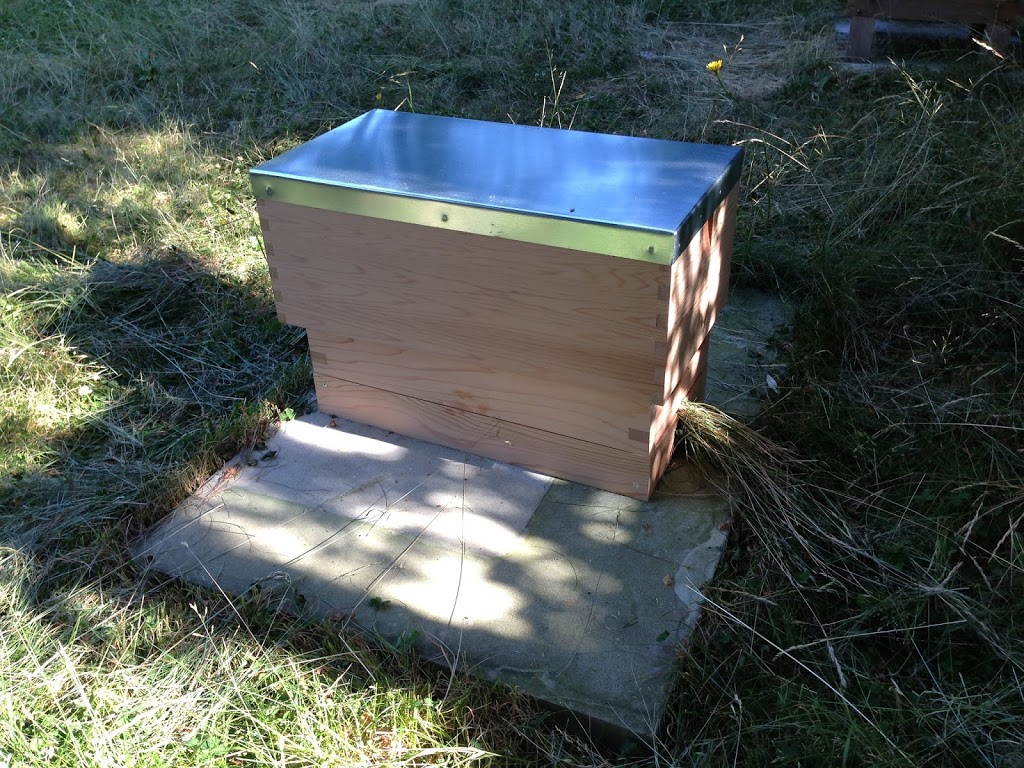
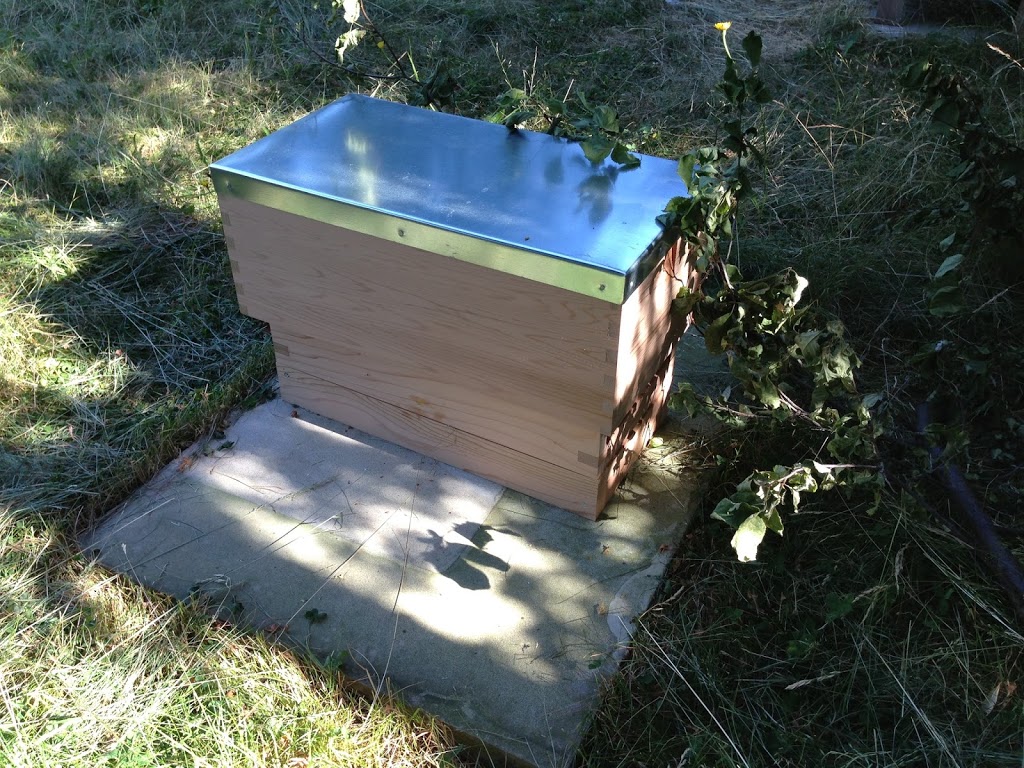
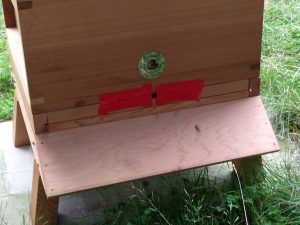
Finally, I came up with the final solution which really works.  As before, the hive entrance was occluded with duck tape, leaving a 6mm diameter hole in the centre.  Immediately in front of this hole, the metal cylindrical part of a garden hose tap connecter was placed and attached with duck tape.  This worked because it allows bees into and out of the hive whilst also allowing sufficient space within the metal cylinder to allow the bees to defend themselves against attack.

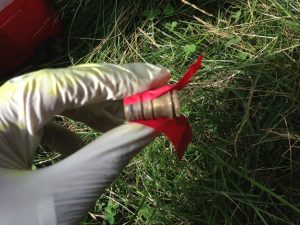
Garden hose tap connector
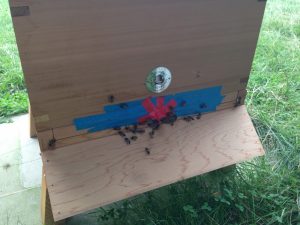
The final solution

PROBLEM 2: Too many wasps roaming around the hive


SOLUTION 2: 

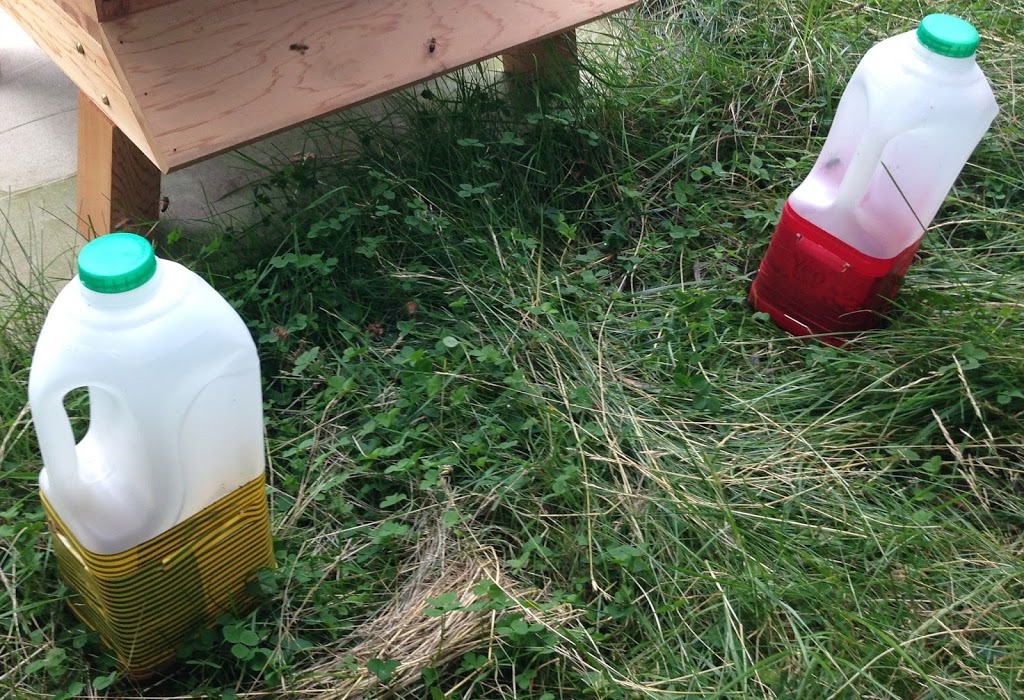
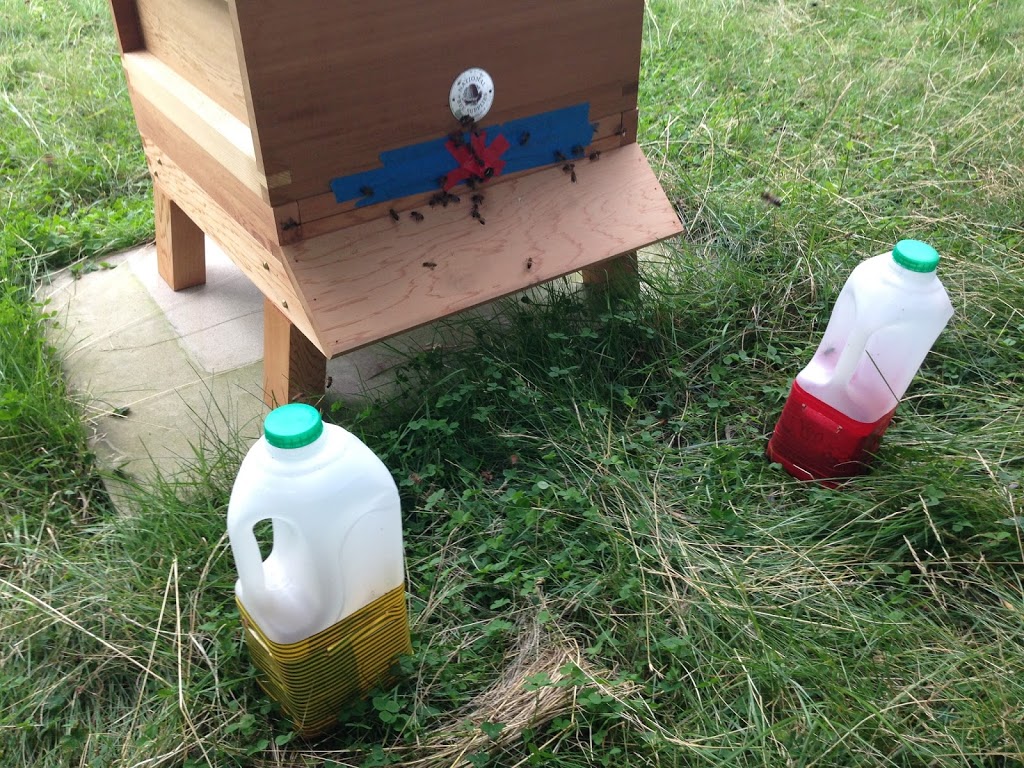
I decided to create a wasp trap to help reduce the numbers of wasps and therefore reduce the risk of them attacking the colony.  The shop bought ones were expensive and I had read didn’t work very well.  So I made my own which only takes 5 minutes and here’s how…

 
DrBeekeeper’s Wasp Trap


Equipment needed
  • Milk bottle (plastic and empty with lid in place)
  • Scissors
  • Ruler
  • Nail or sharp object
  • Opaque/dark-coloured duck tape
  • Old fruit jam/juice or anything wasps like
Method 
  1. Apply tape to the lower half of the milk bottle (to prevent light from entering).
  2. 1 cm below the upper rim of the taped area, on all four sides, create flaps of approximately 4-6cm in width and 1cm in height (depending on the size of your bottle, these will be the entry points for the wasps).
  3. At the top of the milk bottle, around the lid create holes using a nail or sharp object (which will allow the smells of the trap contents to attract wasps).
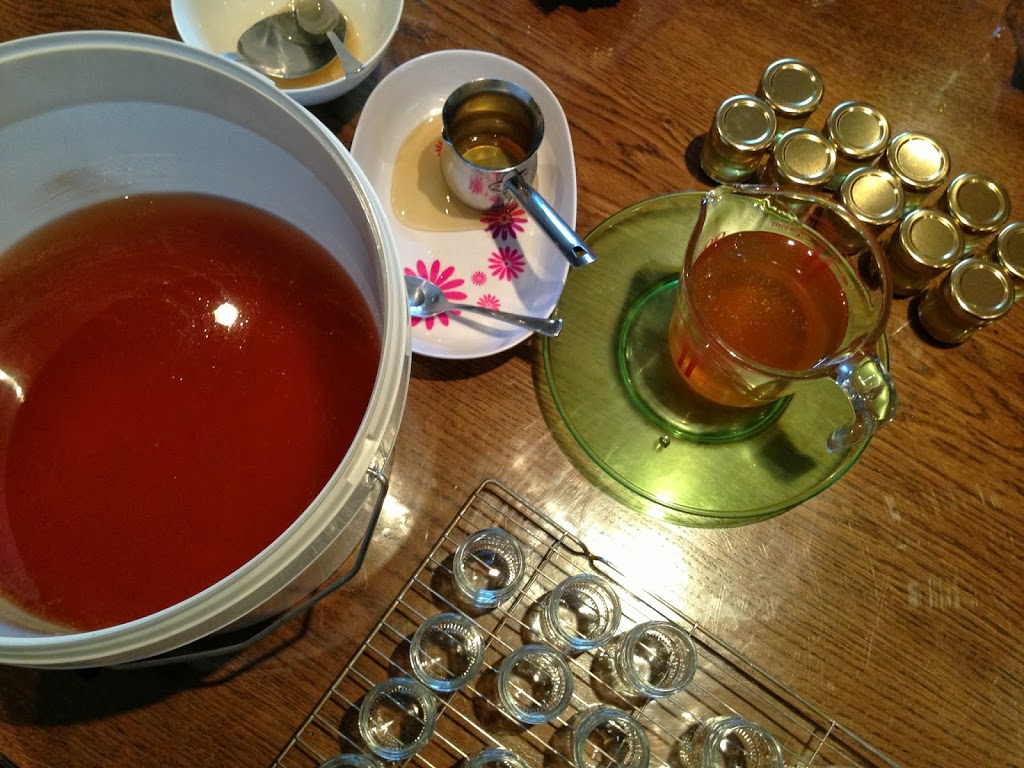
  4. Fill the milk bottle to a level approximately 2 cm below the cut flaps with any substance which attracts wasps eg. rotten fruit, fruit juices, a few spoons of jam (note bees are not attracted to this disgusting mixture!).
  5. Finally, place the wasp trap in front of the hive or near the area where wasps are congregating.
  6. Every few days clear out the trap which will contain lots of wasps but should not contain any bees
How it works
The wasp trap works on the principle that wasps are attracted to the bottle by the smell of the contents so they enter the bottle through the flaps on the bottle sides.  Naturally wasps are attracted to light, and as the bottom of the bottle is dark, they are drawn upwards to the light area in the upper half of the bottle.  Eventually then become tired and end up in the liquid feed at the base of the bottle.
The combination of both of the above solutions has helped to protect my colony from attack from wasps.  During this process, I’ve also learnt about the more gentle, clean, and mature behaviour of bees compared with wasps.  It really works so if you have any problems with wasps in or around your hive do give it a go.  Let me know how you get on!
Posted on 2 Comments

Too many queen cells? How to split the colony to prevent swarming…

Things got chaotic when I discovered lots of queen cells in the hive

After returning from holiday, I inspected the hive and couldn’t believe how many queen cells there were.  Something was clearly wrong, so I called me bee mentor who explained this could be a sign that the bees were preparing to swarm.

Sealed queen cell
Open queen cell from hatched queen

I was advised to split the hive so this is what I did…

Splitting an existing hive with no queen into two hives with queens

    1. I inspected every frame on the existing hive and located the best looking queen cells.
    2. I set up a new empty nucleus hive a few metres next to the existing hive.
    3. From the existing hive, I transferred one brood frame with a good queen cell (you could see the larva inside as it hadn’t been sealed yet) into the nucleus hive.  On the frame that I transferred I destroyed all the other queen cells.
    4. So the nucleus hive now contained one frame with the queen cell.  From the existing hive I also transferred a frame of stores and a frame of brood which I placed either side of the queen frame.  A dummy board was inserted.
    5. Then I shook bees from a single frame from the existing hive into the nucleus hive to increase the population of the new colony (before returning the shook frame to the existing hive).
    6. The nucleus hive was then closed and the front entrance stuffed with some grass.
Some grass stuffed into the entrance of the new nucleus hive
  1. In the existing hive, I destroyed all the queen cells except 2 which were sealed (if I could see the larva at the unsealed stage I would have just kept one).

2-3 days later…

A branch was deliberately placed in front of the hive to force the bees to take an orientation flight
  1. I placed a branch in front of the nucleus hive entrance so that when the entrance grass was removed, the bees saw a new environment which forced them to take an orientation flight (preventing them from returning to the existing hive).
  2. I inspected both hives and could see that in the existing hive the 2 queen cells had both hatched (so the colony would have to select 1 queen which would subsequently go on a mating flight).  In the nucleus hive, the previously unsealed queen cell was now sealed so was developing as expected.
9-10 days later…
  1. The nucleus hive was opened and the queen had successfully mated as there were new larvae.
  2. The existing hive was also checked and there were lots of eggs cells and also a sighting of the queen bee confirming successful mating.
  3. The frames from the nucleus hive were removed and inserted into a new hive at the same site.  A contact feeder was placed on the new hive to help build up the colony.
So after all this time, what had seemed like a potentially disastrous situation actually resulted in the production of two colonies from one, both with new queen bees.
To find out more about what to do when you have too many queen cells in the hive see this excellent guide from the Welsh Beekeepers Association: ‘There are queen cells in my hive – what should I do?’.
Posted on Leave a comment

EMERGENCY: SAVE YOUR BEES!

The National Bee Unit has issued a warning that with the continued poor weather there is a risk that colonies might run out of stores.  They have advised food levels to be checked with a quick hive inspection.
I checked my hive by very quickly removing the roof and then the insulating sheets which I had placed on top of the crown board.  It was a relief to find lots of active bees at the centre most hole in the crown board.  I had 2.5kg fondant in plastic packaging which I pierced and laid over the hole in the crown board.  A little smoke was very helpful clearing the bees out of the way to avoid them being squashed when the fondant was placed on the crown board.  I then quickly closed the hive and am hoping that’s enough!
The key points from the National Bee Unit are:

‘• The colony may still have stores available which are at the other end of the brood chamber to the cluster of bees. If there are ‘empty’ frames between the two then the bees could still starve, despite food being in the chamber. Move the frames of food directly next to the outer frame where the cluster resides, ensuring that you score each frame of food (not excessively, but enough to stimulate feeding). Be sure not to knock or roll the bees when doing this and to be as quick as possible.

• If the colony has little or no frames of food then give them a block of candy or fondant. You want to aim for about 2.5 kg per hive and although this may seem to be a great expense, it is far less than the money you will have wasted should the bees die.

• Mini plastic bags that are used to store loose fruit in from the supermarket are perfectly acceptable for holding the fondant and cost nothing. Pack the candy in the bag and then pierce holes in the appropriate place once you get to the hive. If the bag seems fragile then you can double bag it (just be sure to pierce both bags).

• At this time of the year we would usually start feeding sugar syrup but with these temperatures it is still too cold. Place the fondant directly above the bees, turning the crownboard if necessary so that one of the porter bee escape holes is above the cluster.’

Posted on 2 Comments

The battle against varroa commences…

Varroa, a parasitic mite associated with honey bees, is a major problem for beekeepers worldwide. When I first started keeping bees I had no idea that this parasite existed and its huge impact. Varroa feeds on body fluids of the honey bee and spreads viruses in the process. This can result in deformities in, for example, the bees wings. This parasite is also thought to play a role in a worrying phenomenon called colony collapse disorder where all the bees in a colony suddenly disappear.

As part of my battle against varroa, recently the hive was treated with oxalic acid. This helps kill the varroa and is best applied at this time of year, as with all varroa treatments, because there are no honey stores so only what needs treatment gets it.

The oxalic acid is drawn up in a syringe and about 5mls is squeezed onto the top of each frame in the brood box. And that’s it – hopefully this’ll strengthen the colony for the spring. All this reminds me of drawing up medications and treating people in my hospital…so many parallels between the bee and real world!

Posted on Leave a comment

The hive has been mouse-proofed!

Last week I ordered a mouseguard for the hive to prevent mice from finding a cosy home inside my hive this winter. I went out yesterday to fit it – a thin piece of metal with bee size holes which go in front of the hive entrance. Feeling lazy, I thought I could get away without my bee suit. That was a mistake as interfering with the front of the hive upset the bees and although it was cold a large number came out to defend the hive. So I had to retreat and suit up properly. After fitting the mouse guard I somehow managed to bring a few bees back home!!